 This shall be my first post that addresses something different than all my previous posts. I've decided to "free" myself on what I have to write in this site :-)
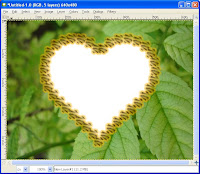
It is about a simple trick to make a photo frame in GIMP (GNU Image Manipulation Program). Most of you might be already familiar with Photoshop; GIMP basically does the same thing, more-or-less. See here if you want to know more! The picture at the left shows the result.
Follow the steps below to produce the frame! Note that the menu-sequence used here is according to GIMP 2.4.6 which may differ with that in the previous versions.
 Step 1
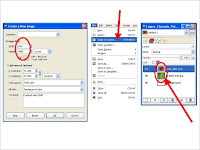
Open the images as layers ("leaves" for the background, "heart" for the frame master -- you can also produce the frame master directly within the GIMP, however my favourites are to look for some nice PNGs with transparent backgrounds on this site)
Step 2
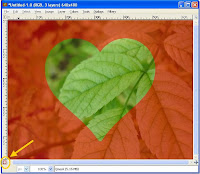
 On the layers window right-click the frame master layer then select "alpha to selection". Activate the background layer, press the quickmask button (as shown) and continue with blur e.g. [Filters]-->[Blur]-->[Gaussian Blur]
Then deactivate quickmask and continue with:
[Select]-->[Invert] and [Edit]-->[Clear]
 Step 3
Add a transparent layer at the top ([Layer]-->[New Layer]); we call this the top layer. On the layers window right-click the frame master layer then select "alpha to selection". Activate the top layer, continue with [Edit]-->[Stroke Selection] then select "Stroke with a paint tool". Make it sure that you have configured the brush as indicated below.


 For a better visual effect, add new transparent layer just below the top layer (we call this top shadow). Right-click the top layer then select "alpha to selection". Activate the top shadow, continue with [Select]-->[grow]. Choose a value to grow the selection, say 5 or 10 pixels; set your favourite (foreground) color and continue with [Edit]-->[Fill with FG Color].
Merge the top layer, top shadow, and the background (leaves) layer. The frame shall be now ready for your photos :-)


0 comments:
Post a Comment